
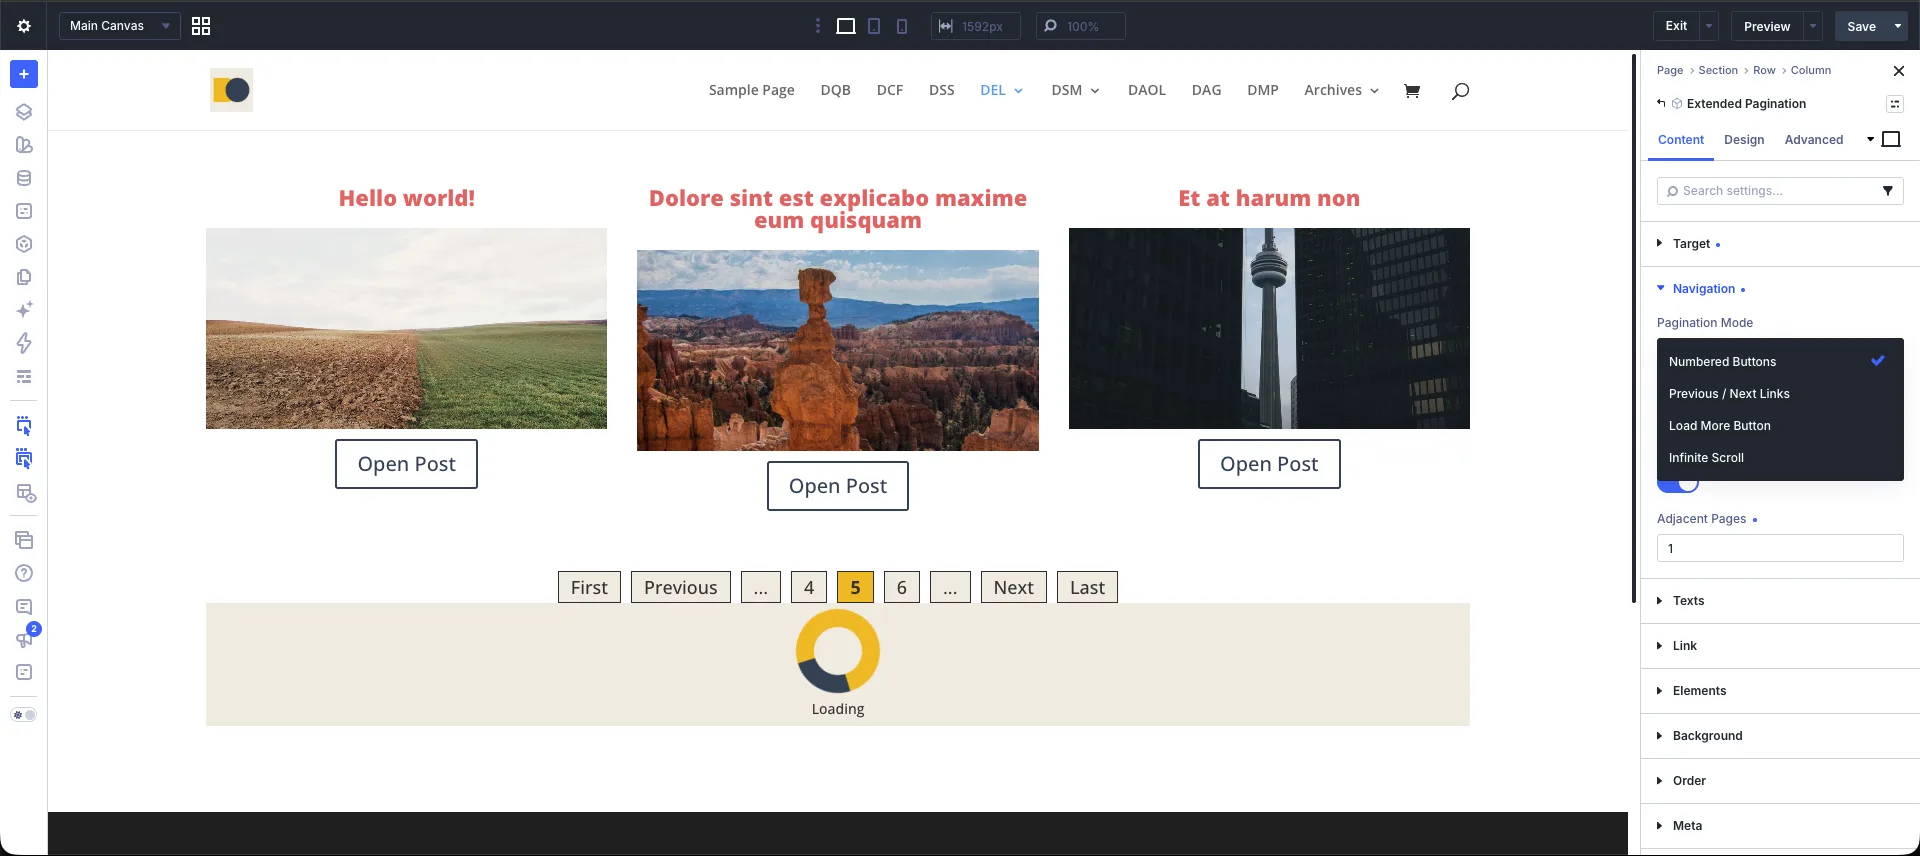
Paginating a Divi 5 loop has traditionally meant one of two compromises: hardcoded WP_Query pagination arguments, or a default pagination module that reloads the entire page. The new Extended Pagination module in Divi Extended Loop removes both. It connects to any loop already on the page and lets visitors load the next batch of results in the background — via numbered buttons, previous/next links, a load more button, or automatic infinite scroll — without a single full page reload.
Extended Pagination Settings Quick Reference
| Setting | Recommended Setting | Description |
|---|---|---|
| Target Loop | Any active loop | The loop on the page this pagination controls. Every active loop is listed automatically and named after its module. |
| Pagination Mode | Numbered Buttons | How the next set of posts loads: numbered buttons, previous/next links, load more, or infinite scroll. |
| Show Previous / Next | ON | Adds Previous and Next links before and after the numbered buttons. |
| Show First / Last | OFF | Adds First and Last links that jump straight to the first and last pages. |
| Adjacent Pages | 3 | Number of page links shown before and after the current page before truncation. |
| Load More Text | Load More | Label shown on the Load More button. |
| Loading Text | Loading | Text shown alongside the loader while a new page is fetched. |
How to Set Up AJAX Pagination in Divi 5
- Add the Extended Pagination module inside the Divi 5 Builder.
- Set the Target Loop to the loop you want to paginate.
- Choose a Pagination Mode, then adjust the navigation, text, and design settings to match your layout.
When a visitor clicks a page link or scrolls to the bottom of the loop, the next page is fetched in the background and swapped into the loop — the page itself never reloads.
Common Implementation Scenarios
How Do I Add Numbered Pagination to a Divi Loop?
Set Pagination Mode to Numbered Buttons (the default). Turn on Show Previous / Next and Show First / Last to surround the page numbers with full navigation, then adjust Adjacent Pages to control how many numbers appear before truncation.
How Do I Create a Load More Button?
Set Pagination Mode to Load More Button. Each click appends the next page of results below the current ones, and the button label is controlled by the Load More Text setting.
How Do I Enable Infinite Scroll?
Set Pagination Mode to Infinite Scroll. The next page loads automatically as the visitor scrolls near the bottom of the loop, appending results continuously.
How Do I Add Previous / Next Links Only?
Set Pagination Mode to Previous / Next Links. This shows a compact control that steps one page at a time, with no page numbers.
Pagination Mode Reference
| Mode | Behavior |
|---|---|
| Numbered Buttons | Shows page number links (1 2 3 …). Clicking a number replaces the current page of results. |
| Previous / Next Links | Shows only Previous and Next links that step one page at a time. |
| Load More Button | Shows a single button that appends the next page of results below the current ones. |
| Infinite Scroll | Automatically loads the next page as the visitor scrolls near the bottom of the loop, appending results continuously. |
Best Practices for Extended Pagination
- Pick the Right Mode for the Content: Use Numbered Buttons when visitors want to browse non-linearly, and Infinite Scroll or Load More for feed-style content where continuous reading is the goal.
- Set Adjacent Pages Thoughtfully: With Adjacent Pages set to
3and the visitor on page 5 of 10, the module shows… 2 3 4 5 6 7 8 …. Set it to0to display every page without truncation — useful for short result sets. - Style the Loader: The loader appears inside the loop while a page is fetched. Adjust its Size (20–300 px, default
48px) and Border to create a spinning ring that matches your theme. - Match the Active State: Use the Active Background Color option to make the current page link visually distinct, so visitors always know where they are in the results.
Read the full documentation here.
0 Comments